Centering and Lens Shift: How to Center On-Axis Projection and Why it May or May Not be Best.
By Dave Rodgers (Marketing Manager of Elite Screens Inc.)
Whenever people come into your home or business to enjoy your video display, all they know is the proverbial “lights, camera …action!” For all they know, you turn on the projector and that’s it. Anyone who is either in this business or has even put on a projection display before know there is a lot of preparation that goes into it all before hand. The projector and screen need to be compatible. The environment must not have features that will adversely affect the visual display. Once that is done, any industry expert will say “what about the sound?”; “does the brightness make the image pop?”; “how well is the contrast defining dark levels?” or “is the image color temperature balanced?”. However, before any of that, the one pivotal question you should always address is “have I properly centered the projector and screen?”
There are basics involved that should be understood. When your projector is perfectly on target (or “on” – axis) it is “centered”. This also applies to the viewer and whether or not said individual is sitting in a location that is ideal to experience optimal visual performance. When the projector or viewer is off target, it is “off axis”. Although there is a process, here is an easy walk through on the basics needed to maintain a centered image.
Throw Distance and Zoom Function
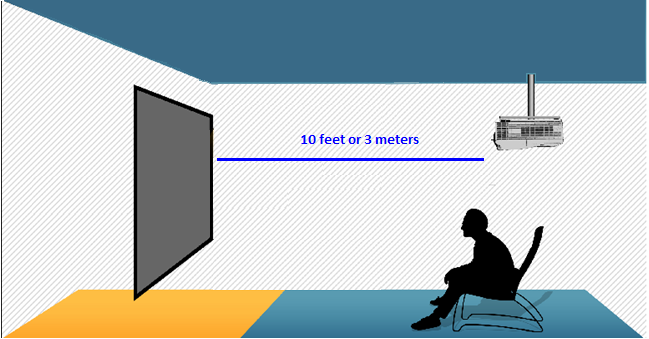
The distance between the projector and screen determines what the image size would be. Throw Distance, is the physical distance between the projector’s lens and the aim point on the projector surface (screen) itself. The shorter the throw distance, the smaller the image is. The greater the distance, the bigger the picture will be. It is here between the projector and screen where proper alignment comes into play. Misalignment leads to distortion of what should be an equiangular quadrilateral (rectangle) – shaped image. However, since increasing the distance between the projector and screen also increases image size, modern projectors have been engineered to give their operators added flexibility by means of a zoom function to provide a degree of zoom range. A Zoom Range, is the minimum-to-maximum range of throw distance that the projector can be at while maintaining the same image size. A Zoom Function, is the actual mechanism that allows the projector to have an adjustable zoom range. It adjusts to give the projector a limited range that maintains a consistent image size despite a variable throw distance.
Adjusting the Settings to Maintain a Fixed Lens Offset
When a projector is off axis from its correct alignment, there is a noticeable inequality of distance traveled between the lens and the various points on the screen. This creates a distortion effect where the image loses its intended rectangular form and instead “keystones” forming a distorted image that will either be wider on the top than bottom; wider on the left or right, or vice versa.
Keystone effect, is created when the projected image has a trapezoid (trapezium) shape. This is caused when the projected light is hitting the screen surface from too high, too low or too far off side in its angle of incidence. (See Sept 2016 article.)
Most projectors have a keystone adjuster to fix this. However, it is better to rely on your lens shift in order to maintain optimal resolution. A keystone adjustor balances out the image shape by removing pixels from various points of the image until the top and sides are of proportional length. The lens shift, redirects lens focus to match its intended axis without sacrificing picture quality. Today, there are few projectors without this feature that can only be used in-line with the screen.
Lens shift operates in two different ways. Horizontal Lens Shift is the screen’s ability to project a centered image without needing to be horizontally centered itself. In fact, most projectors have this feature and it typically allows them to remain centered with a fixed lens offset that is up to 50% of the screen’s height measurement.
Vertical Lens Shift, is the screen’s ability to project a centered image without needing to be itself vertically centered. This is also a common projector feature and it typically allows them to remain centered with a fixed lens offset that is determined by the projector’s offset factor multiplied by the screen’s width. Fixed lens offset is possible because of a projector’s lens shift capabilities but it is limited by it as well.
The Fixed Lens Offset is merely the amount of distance that a projector can be off axis while maintaining a perfect rectangular image.
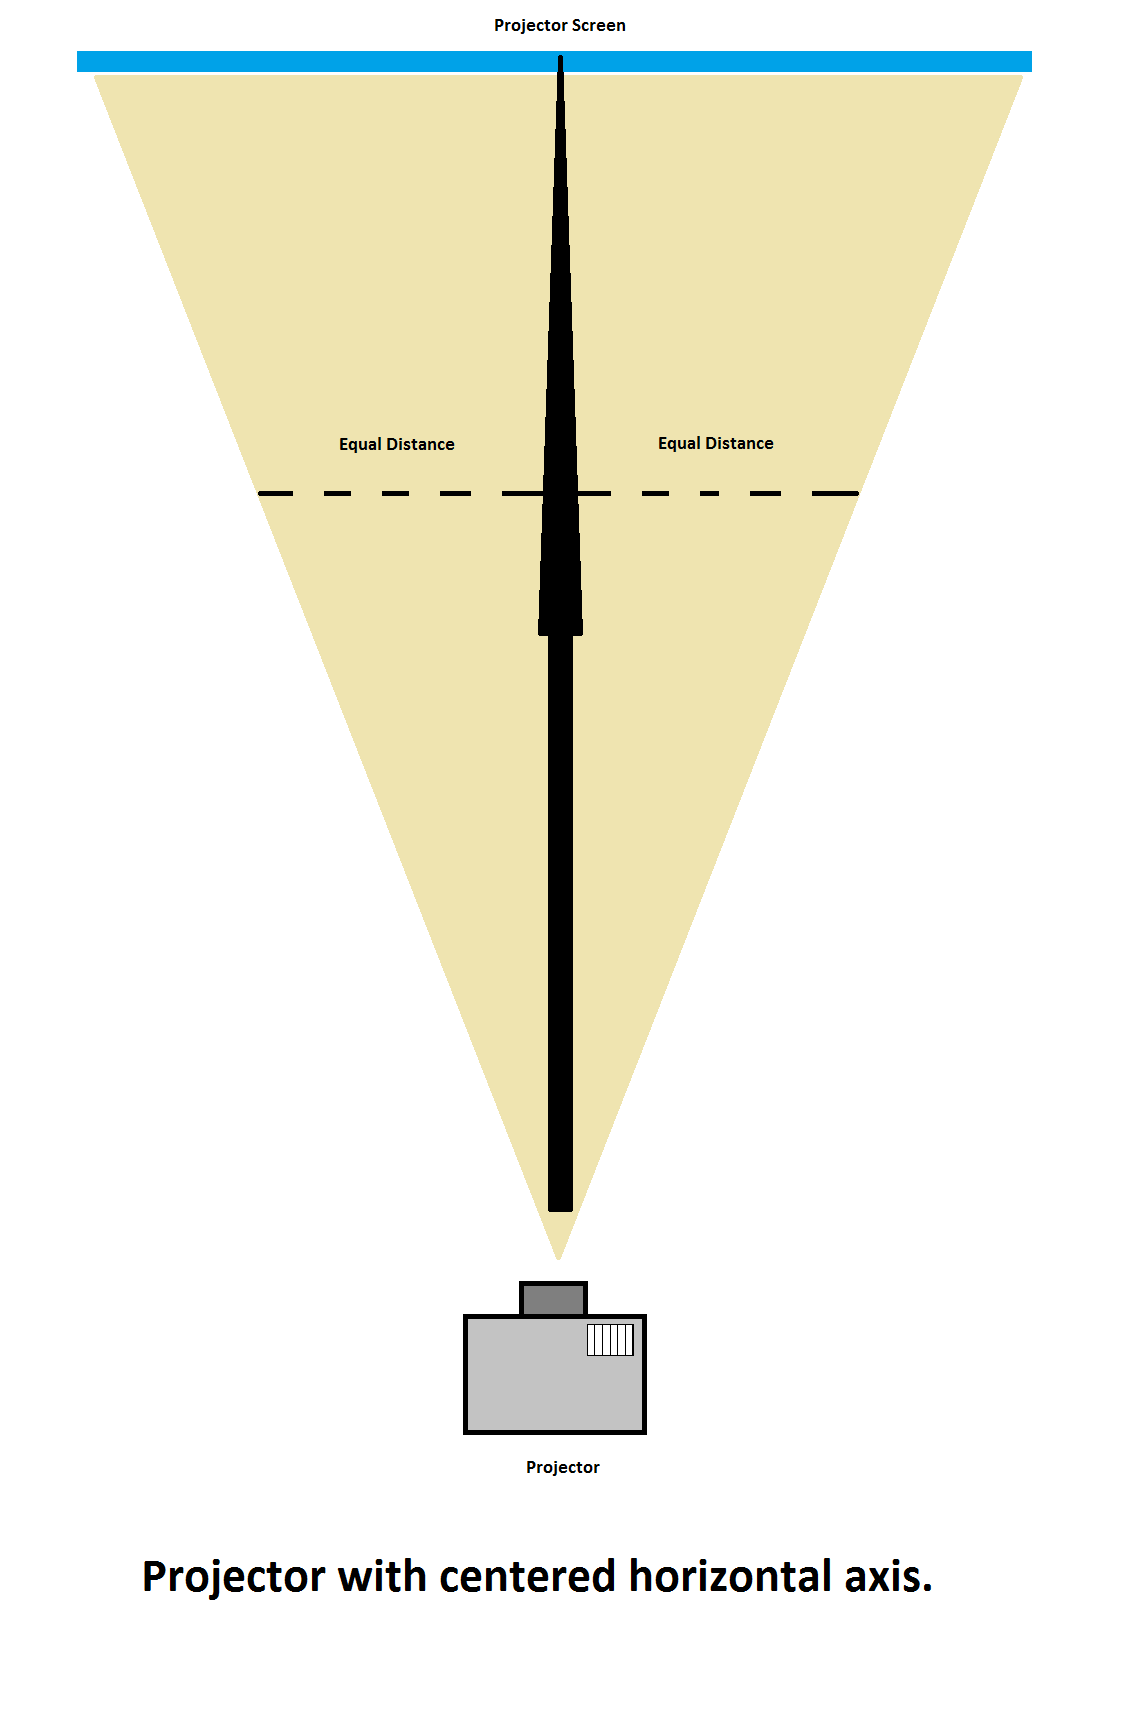
Finding the Right Position and Location, then Centering
The “Sweet Spot” can mean either the optimal placement of projector and screen to maximize resolution, brightness, contrast and color reproduction; or it can refer to the viewer’s best physical location in order to enjoy the afore mentioned attributes in the best possible way. Starting with the room, find a common wall if possible. A Common Wall will be parallel to the perpendicular “centered” angle of incidence between your projector and screen. This is the most common method for a squared or at least, equiangular room of four walls. Simply measure the exact distance from the wall to the center of your projector screen and apply that same distance to the center of your projector lens. If the walls are uneven or the projector’s ideal mounting position is obstructed, the fixed lens offset allows the installer to shift the lens to still provide a “centered” image even if the projector’s placement is not itself, centered physically. Another situation would be centering the screen without using the surrounding architecture of the room as a reference. This would be done with uneven walls or a room that is not of a quadrangle shape. Once the projector screen is in its precise location, take a measuring of the screen’s center and use a laser leveler to align the center of the projector’s lens so that both will be perfectly aligned.
Following the steps here will allow you to achieve the professional grade alignment worthy of any high end installation. Audio Visual design is a craft unto itself. Beyond all the tech talk, mathematical angles, and constantly evolving technology is the true “big picture” and that is creating Dream Windows, one fantastic installation at a time.
-DR
Related Products / Categories
Need Assistance?
Contact us for general sales questions, warranty support, technical assistance or providing feedback.